Stone or rock chips on cars are common damages from stone chips hitting your vehicle on the highway. You will find most of the damage in the front bumper and hood. Apart from spoiling the aesthetics, chips to the paint job are usually superficial marks that require little attention. This is part of the normal wear and tear.
However, stone chips can vary in depth and width, meaning some can cause deep marks, ruining the clear coat. If you don’t paint or remove the stone chips on certain bodywork materials, it can lead to corrosion, which is not good.
As I’m sure you know, taking your car into a paint shop to repair rock chips on the paintwork is not cheap, so is there a more affordable, DIY method of hiding stone chips in a car? Yes, there is! Below are the techniques I’ve used to hide, repair, or cover stone chips, which are very similar to hiding scratches in plastic fenders.
Why Should You Repair Stone Chips on Car Paint
Stone chips are a common problem when it comes to car paint. They make your car look unsightly, leading to more severe issues with the paintwork if left unattended. You should look to repair paint chips for the following reasons:
- It helps to prevent rust from forming on the metal body of your car.
- Preserves your car’s value, making it look more attractive to potential buyers.
- It prevents water, contaminants and air from getting under a clear coat and paint, preventing it from lifting.
Not to state the obvious, but if you’ve got an old run around that you don’t care about cosmetically, then the only reason you might want to repair rock chips is to prevent rust.
The Correct Repair Method
This method of hiding or repairing stone chips in car paints works very well if the chips are small to medium. In addition, relatively recent stone chips not spread over a large area are the easiest to fix at home.
Things you’ll need:
- Car wash kit – sponge, soap, buckets, drying towel, etc.
- Wax pen
- Paint touchup kit consisting of either a touchup pen or the paint and clear coat
- Denatured alcohol
- Polishing compound
- Microfiber cloths
- Wet and dry sanding paper – 1500 to 2500 and 4000 grit
- Cotton bud/swabs or Q-tips
- Polishing machine (Optional)
Step 1 – Clean The Car
Thoroughly wash the stone-chipped car with warm water and soap (car shampoo is best). Rinse the vehicle with plenty of water and dry it with a proper detailer drying towel to speed up the process and prevent watermarks from forming.
Step 2 – clean the chips
If you know how to use a machine polisher correctly, you can machine polish the stone chipped area; it can remove a lot of defects and rough edges in the clear coat, revealing the stone chips more clearly. However, if you don’t have a polishing machine, you can start polishing it manually.
Use a small polishing compound over the area where the stone chips are concentrated to soften the rough edges. Don’t use too much of the polishing compound or rub too aggressively, as it can damage the surrounding paint.
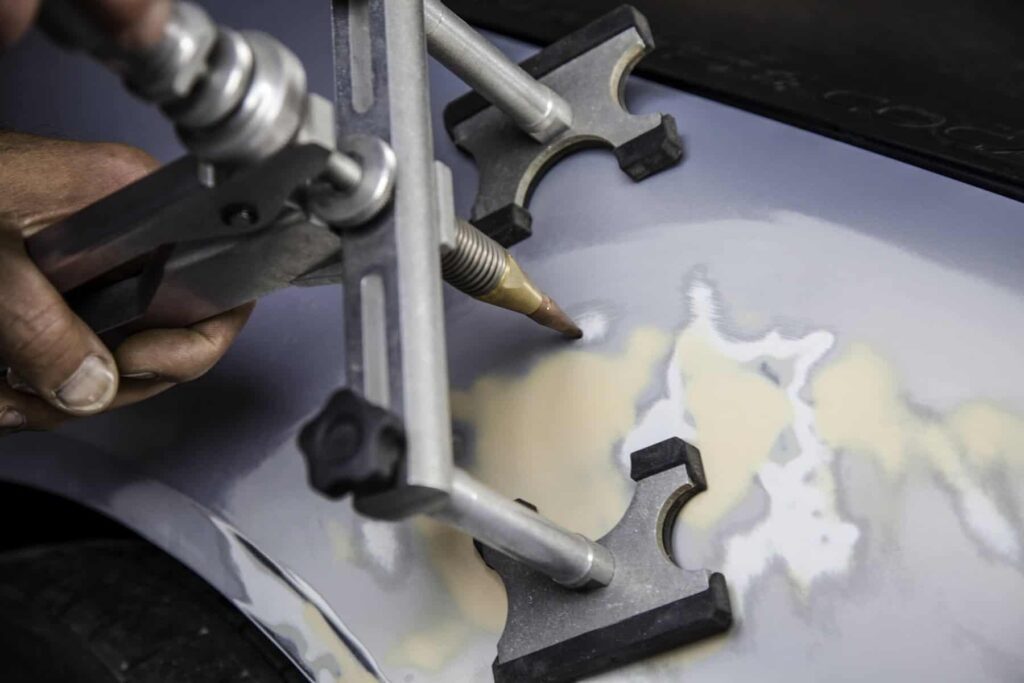
Step 3 – Prep The Stone Chips
Use a wax pen to mark every visible stone chip. Next, cut the 1500- 2500-grit sandpaper into small strips and wrap it around a sanding block before you start the sanding process. This technique of sanding will prevent the surrounding paint from being scratched. Use short strokes without applying too much pressure during the sanding process. Spritz some water on the stone chips to tone down the aggressiveness of the sandpaper.
Wet sanding will usually take longer than dry sanding the stone chips but will produce an even surface for the paint you want. After sanding all the stone chips, wipe them with a microfiber cloth. The stone chips should now have a nice uniform-matte look with no sharp edges or picks.
Step 4 – prepping for paint
Get the thinner (alcohol), dip the cotton swabs, and clean the sanded stone chips. After you use the thinners to clean the area, wipe it down with a microfiber cloth. Using thinners to clean the stone chips is a fantastic way to clean the leftover debris, and it also acts as a bonding agent for the paint you will use in the next step.
Step 5 – painting
If the rock chips you are dealing with are tiny, you can get away with using a paint touchup pen. You can easily find the paint pen in auto shops and car accessory dealers. Manually painting bigger chips is best.
Using dabbing motion, base paint and a small paintbrush cover all the stone chips. Take note that the base coat is not just sitting in the crevice of the stone chips; ideally, it should look like a little hump. However, don’t pile the base coat all at once. Do it in layers with at least ten minutes in between. Once the paint has dried, follow up with a few coats of clear coat and allow it to dry for at least 48 hours. Don’t panic; it all looks a little rustic right now.
Step 6 – Refining And Finishing
After the paint and clear coat have dried completely, use sandpaper to sand them once more gently. This final sanding process is to level the clear base coat so everything looks even and nice. Use the finest sanding paper, 4000 grit, at this stage. Take your time to sand the repaired stone chips for the best results. Once the clear coat looks level with the rest of the paintwork, polish the repaired and painted stone chips using a polishing compound to give your car a refined, glossy look.
Finally, wipe down the repaired area with a microfiber cloth, and your car’s paintwork will be restored to its initial glory!
How to Hide Stone Chips Without Sanding and Painting
If your car’s paintwork has minor chips or light scratches, you can make them less visible using a type of car polish called glazes. This polish fills in the sharp edges of the chips, rounding them off. As a result, when the sunlight hits the chips, the light doesn’t bounce off the edges like it does pre-glaze. This makes the stone chips less visible. While they might not completely disappear, they will certainly become less obvious unless closely inspected.
When Should You Not Attempt to Repair Stone Chips Yourself?
Repairing and painting stone chips on your car can be a cost-effective solution. However, it’s essential to assess the severity of the damage before attempting any repairs. If the stone chips are large and have dented the bodywork or are spread over multiple areas, it’s best to leave the painting to the professionals. A paint shop can easily spray over the damaged hood or fender in such cases.
If the stone chips have already started collecting rust, trying to hide them with a DIY job is not recommended, as it may cause further damage. Additionally, if the base metal is exposed due to the stone chipping, it’s best to avoid repairing it yourself.
How to Protect Your Car From Stone Chips
Using a urethane PPF paint protection film is one of the best ways to avoid this issue. The clear wrapping acts as a barrier between your car’s paintwork and any road debris that may come into contact with it. This can prevent scratches, chips, and other damage caused by small stones or debris. The process of applying a protection film can be quite tricky, and it requires a lot of pre-paint work and cleaning prep to be done correctly. To avoid the formation of air bubbles, it might be best to have it applied by a professional painting shop.
However, if you cannot apply a paint protection film, you can still take some precautions to protect your car. One of the easiest things you can do is maintain a reasonable distance from other vehicles while driving. This helps to reduce the risk of stone chips and other debris hitting your vehicle. Also, avoid driving behind large trucks or buses, as they kick up more debris.
Summary
If you have a few small stone chips on your car, you can repair them yourself using the method provided in this article. It’s a cost-effective way to hide and fix them or improve the paintwork. However, if the chips are large or you’re unsure, let a professional handle the repairs.